
DIY Bridal Hairpiece Tutorial
2January 16, 2014 by branchingfig

I’ve found myself thinking about my grandmother, my Savta, a lot lately. My grandma recently turned 89 – which by itself is quite a feat. But what’s really impressive is her optimism and her positive outlook on just about everything. Every week during our transcontinental phone call, Savta will fill me in on the concert she just got home from, the trip she’s excited to embark on the following Tuesday, the museum exhibit she didn’t quite understand but still got a kick out of, and the funny thing that happened at Friday night dinner with my cousins and aunts. Before we say goodbye for the week, she doesn’t fail to mention how lucky she feels to have led such a full life and to have such a family.
I know this may seem like a strange and sentimental way to start a post about how to make a bridal hairpiece, but stay with me..

The last time I saw Savta before I got engaged, she put a delicate silver and pearl brooch in my hand, and told me she loved me and wanted me never to forget it. When P. and I were planning our wedding, one of our biggest hopes was that both of our grandmothers would be able to celebrate with us (P.’s Gram’s just turned 90 and is another special lady).
We weren’t sure if Savta would actually be able to make the day-long international journey to join us in person, but I wanted something of hers walking me down the aisle and into my new life with P. So I decided to turn the brooch Savta had given me into my bridal hairpiece.
Promised you I’d get back to the accessory!


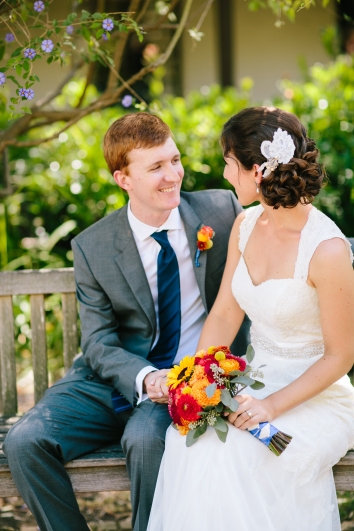
Well, lucky for us, we got to share this special moment in our lives with both of our grandmothers!
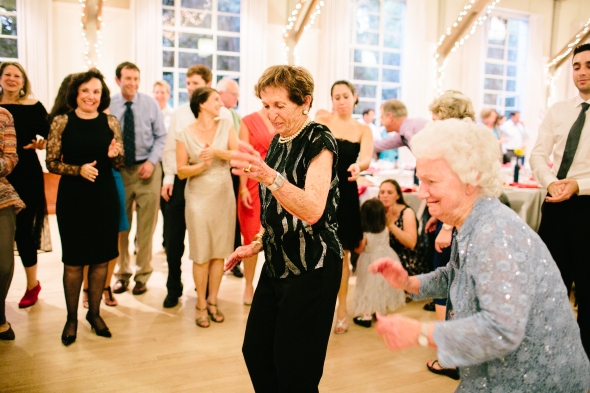
…and it was so fun to see Savta’s face light up when she noticed my hairpiece and realized it was the brooch she’d given me.

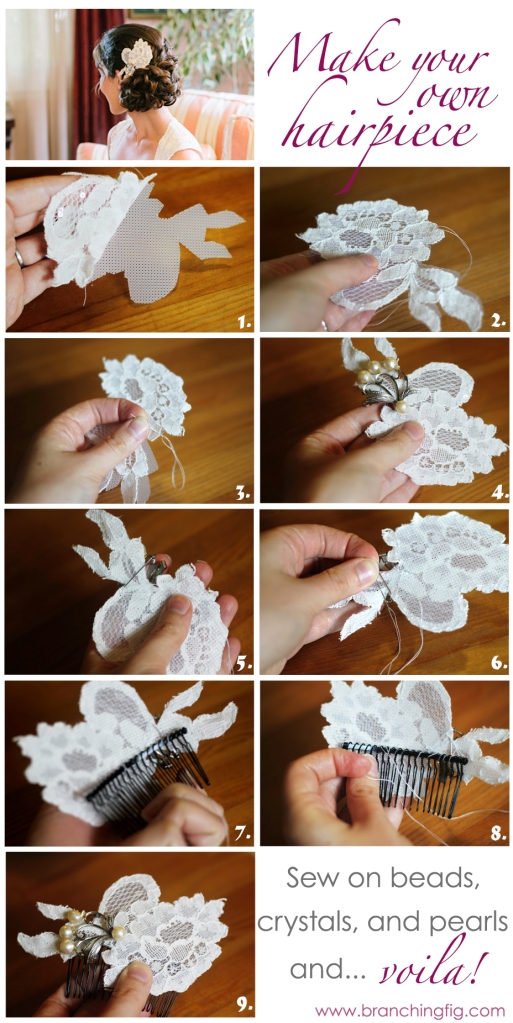
See below for a step-by-step tutorial on how to make your own hairpiece. I used lace to incorporate a vintage vibe into mine. If you prefer a look more like this, you can easily substitute sprays of pearls and crystals on wire sewn to a piece of plastic canvas. You can use an heirloom brooch – like I did – or find one at a local thrift store, or you can just go hog-wild sewing on piles of pearls, crystals, and beads, and sticking on rhinestones.
WHAT YOU’LL NEED:
- Lace – you can either use a pre-cut lace applique, or cut your own out of a piece of lace (like I did)
- A piece of plastic canvas bigger than your lace shape
- Hair comb – you can buy a set of 2 at your local drugstore for a few bucks
- Thread in a similar color as your lace
- Sewing needle
- Scissors
- Embellishments – such as a brooch, beads, pearls (real or glass), crystals, etc.
WHAT YOU’LL DO:
(These directions are pretty extensive, but this project isn’t difficult if you follow these steps, and won’t take you too long to do… promise!)
- Find a lace with a design you like and cut it out, or use a pre-cut lace applique. I recommend putting the lace cut-out in the general area you plan to wear your hairpiece and look at yourself from a few angles in the mirror, to make sure the size and shape is to your liking. Once you have the lace ready to go, place it over plastic canvas (which, if you’re like me, you haven’t used since you were a kid to make things like this), and cut out the lace shape.
- Once you’ve cut out the shape, double-check that everything lines up nicely between the lace and the plastic canvas.
- Sew the outer edge of the lace to the plastic canvas, using a thread in a similar color as the lace. Although my lace was ivory, I used white thread.. it doesn’t have to match exactly, just be pretty close. You also don’t have to do a perfect job sewing, just make sure the lace isn’t moving around and won’t flop up or down. Once you’ve sewn all the way around the applique and attached it to the plastic, tie off the string on the wrong side of the plastic canvas (e.g. not the side with lace).
- If you’re using a brooch or sprays of beads, position them on the lace with your hand (or using hair pins), Hold them together as well as you can, in the approximate position you plan to wear your hairpiece, and again look at yourself in the mirror at several angles. If you’re not sure about something, this is your last chance to change it without having to redo too much work.
- If you’re using a brooch, this is the time to clip it into the spot you like. Don’t worry if it’s a bit loose or wobbly, you’re going to sew it on next.
- Using more of the same thread you used earlier, sew the back pin of the brooch to the plastic canvas. Try to avoid getting this through the lace as much as possible. You want to sew together the backing pin and the plastic canvas tightly and many times over – I probably sewed mine in close to thirty times to make sure the brooch didn’t fall out (but that I could still take the hairpiece apart if I wanted, and have the brooch unharmed and in one piece). The better you sew this on, the more sturdy it will be and the less chance it will fall off or break.
- Position the comb on the wrong side of the hairpiece (e.g. not the side with the lace) and make sure that the comb curves in the correct direction so that it will be able to lay flat against your head. Hold the lace and comb together with your hands (or using hair pins) to make sure you know where you want to attach the comb and that it will sit at the right angle.
- Sew on the comb with the same color thread you’ve been using. Note that it doesn’t really matter what color comb you use, as it’ll be hidden in your hair and behind a hairpiece. The only caveat is if you have very light hair, you may not want to use a dark comb as a tiny bit might peek out. I used a black comb, and it wasn’t visible at all once it was placed in my hair.
- Bling out your hairpiece with pearls, crystals, beads and whatever else you might want. Use the same color thread you’ve been using throughout the project to sew them on. I even stuck a few small scrapbooking rhinestones onto my lace to add a bit more texture and shine once I was done sewing on the beads – they all surprisingly stayed put throughout the wedding. Have fun with it!
Have you received a present that made you feel extra special? Do you have something meaningful you want to incorporate into your big day (or already have)? I’d love to hear from you!
Till next time,
~k
NOTE: The live action photos of our wedding day are by the talented Mirelle Carmichael


Awesome post! Love the step-by-step instructions – much needed for someone like me who saw that and was like, “you can MAKE this?!?!”
I’ll keep you posted about how it goes! xoxo
Thanks Rachel! You can do it!! Hope this helps :)